ラベル GoogleMap の投稿を表示しています。 すべての投稿を表示

2014年1月30日木曜日

【Unity、C#】スクリプトでTerrainにStaticGoogleMapを貼り付ける

@baiteen

リアルでは出歩かないので、ゲームをリアルに近づけることにした。

ということで
TerrainにGoogleMap貼り付けて人形歩かせよって思った。


やり方

1.テレインを作成
2.下記のコードをスクリプトにコピペ
3.スクリプトを適当なゲームオブジェクトに追加
4.実行

using UnityEngine;
using System.Collections;
using System;

public class TerrainScript : MonoBehaviour {
    string Url = @"http://maps.googleapis.com/maps/api/staticmap?size=512x512&maptype=satellite&visible=41.832423,140.823471|41.828586,140.821347&sensor=false";
    
    // Use this for initialization
    void Start () {
        StartCoroutine(Download(this.Url, tex => addSplatPrototype(tex)));
    }
 
    // Update is called once per frame
    void Update () {
    }

    /// 
    /// GoogleMapsAPIから地図画像をダウンロードする
    /// 
    /// ダウンロード元
    /// ダウンロード後に実行されるコールバック関数
    IEnumerator Download(string url, Action callback)
    {
        var www = new WWW(url);
        yield return www; // Wait for download to complete
        
        callback(www.texture);
    }

    /// 
    /// テレインにテクスチャを貼り付ける
    /// 
    /// 
    public void addSplatPrototype(Texture2D tex)
    {
        var splatPrototypes = Terrain.activeTerrain.terrainData.splatPrototypes;
        int index = 0;

        SplatPrototype[] newSplatPrototypes = new SplatPrototype[index + 1];
        for (int i = 0; i <= index; i++)
        {
            newSplatPrototypes[i] = new SplatPrototype();
            if (i == index)
            {
                newSplatPrototypes[i].texture = tex;
                newSplatPrototypes[i].tileSize = new Vector2(512, 512);
            }
            else
            {
                newSplatPrototypes[i].texture = splatPrototypes[i].texture;
                newSplatPrototypes[i].tileSize = splatPrototypes[i].tileSize;
            }
        }
        splatPrototypes = newSplatPrototypes;
        Terrain.activeTerrain.terrainData.splatPrototypes = splatPrototypes;
    }
}
GoogleMapからダウンロードする画像サイズとテレインのタイルサイズを合わせないと画像がきれいにでなかったような。
あとテレイン自体のサイズも合わせた方がいんだけど、スクリプトからの指定方法がわかんなかったからやってない。

書いてみたら割と簡単だったけど、テレインをスクリプトから弄るサンプルがあんまりなくて大変だったな。外人さんは多言語対応しようと思わないのかな。

ところでTerrainの読み方ってテレインであってるのかな?

2013年7月28日日曜日

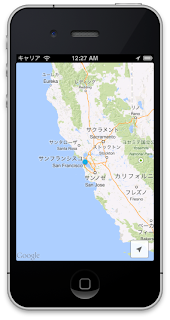
Google Maps SDK for iOS で現在地をマップ中心に表示し続ける


MapKitよりGoogle Maps SDK for iOS のほうが使いやすいって噂なので使ってみた。
とりあえず現在地表示。

やりかた

1.Google Maps SDK for iOSの導入

ここに書いてる通りやる。とっても親切に書いてる。
http://qiita.com/shu223/items/bfb5ef3e45682c2bb763
・ちょっとだけつまずいたところ
ビルド設定の「Architectures を armv7 にする」なんだけど、
俺のはStandard(armv7,armv7s)ってなってて、ん?って思ったけど、そのままでいけた。

2.コード書く

マップ表示して現在地表示するためにちょっとコード書く。
なんだかインポートのコードの表示がおかしい。。。

ViewController.h
#import 
#import 

@interface ViewController : UIViewController

@end

ViewController.m
#import "ViewController.h"
#import 

@interface ViewController ()

@end

@implementation ViewController

GMSMapView *_mapView;
CLLocationManager *_locationManager;

- (void)viewDidLoad
{
    [super viewDidLoad];
    
    // 地図の表示
    GMSCameraPosition *camera = [GMSCameraPosition cameraWithLatitude:-33.86
                                                            longitude:151.20
                                                                 zoom:6];
    _mapView = [GMSMapView mapWithFrame:CGRectZero camera:camera];
    _mapView.myLocationEnabled = YES;
    _mapView.settings.myLocationButton = YES;

    self.view = _mapView;
    
    _locationManager = [[CLLocationManager alloc] init];
    
    // 位置情報サービスが利用できるかどうかをチェック
    if ([CLLocationManager locationServicesEnabled]) {
        _locationManager.delegate = self;
        // 測位開始
        [_locationManager startUpdatingLocation];
    } else {
        NSLog(@"Location services not available.");
    }

}

// 位置情報更新時
- (void)locationManager:(CLLocationManager *)manager
    didUpdateToLocation:(CLLocation *)newLocation
           fromLocation:(CLLocation *)oldLocation {
    [_mapView animateToLocation : [newLocation coordinate]];
    
    //緯度・経度を出力
    NSLog(@"didUpdateToLocation latitude=%f, longitude=%f",
          [newLocation coordinate].latitude,
          [newLocation coordinate].longitude);
}

// 測位失敗時や、位置情報の利用をユーザーが「不許可」とした場合などに呼ばれる
- (void)locationManager:(CLLocationManager *)manager
       didFailWithError:(NSError *)error{
    NSLog(@"didFailWithError");
}

- (void)didReceiveMemoryWarning
{
    [super didReceiveMemoryWarning];
    // Dispose of any resources that can be recreated.
}

@end

良い感じに書けたら完成。
左上の再生ボタンを押すとiPhoneのSimulatorが起動して実行される。


今回も皆さんのおかげでとってもいい感じに出来ました。

今回参考にしたサイト Google Maps SDK for iOSの導入
http://qiita.com/shu223/items/bfb5ef3e45682c2bb763

現在地の表示
http://www.atmarkit.co.jp/ait/articles/1104/04/news117_2.html


2013年6月17日月曜日

Google Maps Android API v2 のマップ上にTextViewでテキストを表示する


マップ表示するだけだとちょっとあれなので、なんかテキスト表示したくなった。

やりかた

まずは表示するTextViewを持つレイアウトファイルを作成
map_overlay.xml


そしてMapFragment継承してマップ表示するフラグメント作成
onResumeでレイアウトViewをActivityに追加する。
MyMapFragment.java
public class MyMapFragment extends MapFragment {
    private GoogleMap mMap;
    private View mLayout;
 
    @Override
    public View onCreateView(LayoutInflater inflater, ViewGroup container, Bundle savedInstanceState) {
        View root = super.onCreateView(inflater, container, savedInstanceState);
        return root;
    }
 
    @Override
    public void onResume()
    {
        super.onResume();

        //マップにレイアウトを上かぶせ
        if(mLayout==null){
            //新規はレイアウトファイルからインスタンス化
            mLayout = getActivity().getLayoutInflater().inflate(R.layout.map_overlay, null);
        }else{
            //すでにある場合もそのままではなぜか表示されないので、一旦削除
            ((ViewGroup)mLayout.getParent()).removeView(mLayout);
        }
        getActivity().addContentView(mLayout, new LayoutParams(LayoutParams.FILL_PARENT, LayoutParams.FILL_PARENT));
 TextView textView = (TextView)mLayout.findViewById(R.id.textView);
 textView.setText("てすと");
    }
}

はまったこと

なぜかタブを切替してまた戻すとテキストが消えてしまう。
なので、一旦Viewを削除してまた追加するようにしたら消えなくなった。
むずかし


2013年6月16日日曜日

Google Maps Android API v2 をActionBarのタブに表示する


見た目がかっこいいからActionBarのタブを使うことにした。

必要なファイル

・MyMapFragment.java : タブ選択時に表示されるフラグメント
・MyTabListener.java : タブリスナー
・MainActivity.java : タブ表示するアクティビティ
・activity_main.xml : タブ表示するアクティビティのレイアウト

やりかた

とりあえずMapFragment継承してマップ表示するフラグメント作成
MyMapFragment.java
public class MyMapFragment extends MapFragment {
    private GoogleMap mMap;
 
    @Override
    public View onCreateView(LayoutInflater inflater, ViewGroup container, Bundle savedInstanceState) {
        View root = super.onCreateView(inflater, container, savedInstanceState);
        return root;
    }
}

次にActionBar.TabListenerを継承してタブとフラグメントを関連付けるためのタブリスナーを作る。
MyTabListener.java
public class MyTabListener implements ActionBar.TabListener {
    private Fragment mFragment;
    private final Activity mActivity;
    private final String mTag;
    private final Class mClass;
    private final Bundle mArgs;

    /** Constructor used each time a new tab is created.
      * @param activity  The host Activity, used to instantiate the fragment
      * @param tag  The identifier tag for the fragment
      * @param clz  The fragment's Class, used to instantiate the fragment
      */
    public MyTabListener(Activity activity, String tag, Class clz, Bundle args) {
        mActivity = activity;
        mTag = tag;
        mClass = clz;
        mArgs = args;
    }

    /* The following are each of the ActionBar.TabListener callbacks */

    public void onTabSelected(Tab tab, FragmentTransaction ft) {
        // Check if the fragment is already initialized
        if (mFragment == null) {
            // If not, instantiate and add it to the activity
            mFragment =  Fragment.instantiate(mActivity, mClass.getName());
            mFragment.setArguments(mArgs);
            ft.add(android.R.id.content, mFragment, mTag);
        } else {
            // If it exists, simply attach it in order to show it
            ft.attach(mFragment);
        }
    }

    public void onTabUnselected(Tab tab, FragmentTransaction ft) {
        if (mFragment != null) {
            // Detach the fragment, because another one is being attached
            ft.detach(mFragment);
        }
    }

    public void onTabReselected(Tab tab, FragmentTransaction ft) {
        // User selected the already selected tab. Usually do nothing.
    }
}

そしてタブバーを表示するためのActivityを作る。
適当にMyMapFragmentのタブを3つ追加する。
MainActivity.java
public class MainActivity extends Activity {

 @Override
 protected void onCreate(Bundle savedInstanceState) {
   super.onCreate(savedInstanceState);
  
   setContentView(R.layout.activity_main);

     ActionBar actionBar = getActionBar();
     actionBar.setNavigationMode(ActionBar.NAVIGATION_MODE_TABS);
     
     for (int i = 0; i <= 2; i++) {
         Bundle args = new Bundle();
         // 必要ならここでパラメータ追加
  String tag = String.valueOf(i);
  actionBar.addTab(actionBar.newTab()
        .setIcon(R.drawable.tab)
        .setText(tag)
        .setTabListener(new MyTabListener(this, tag, MyMapFragment.class, args)));
  }
 }
}

レイアウトはデフォルトでOK。
activity_main.xml


これでできるはず。


2013年6月3日月曜日

Google Maps Android API v2 で現在地をマップ中心に表示し続ける


v2になったってことでGoogle Mapを使ってみることにした。
とりあえず現在地表示。

やりかた

やり方としては、OnMyLocationChangeListenerをセットしてあげて、onMyLocationChangeを拾ったらカメラをその場所に移動させてあげるだけ。
もうちょっとめんどくさいイメージあったけど、簡単にできて良かった。
public class MyMapFragment extends MapFragment {
    private GoogleMap mMap;

    @Override
    public View onCreateView(LayoutInflater inflater, ViewGroup container, Bundle savedInstanceState) {
        View root = super.onCreateView(inflater, container, savedInstanceState);
        return root;
    }

    @Override
    public void onResume()
    {
        super.onResume();

        if (mMap == null){
     // MapFragment から GoogleMap を取得する
     mMap = getMap();
     if (mMap != null){
         // 現在地更新
  mMap.setOnMyLocationChangeListener(new OnMyLocationChangeListener(){
      @Override
      public void onMyLocationChange(Location loc) {
   LatLng curr = new LatLng(loc.getLatitude(), loc.getLongitude());
   mMap.animateCamera(CameraUpdateFactory.newLatLng(curr));
      }
  });    
     }
 }
    }


Related Posts Plugin for WordPress, Blogger...